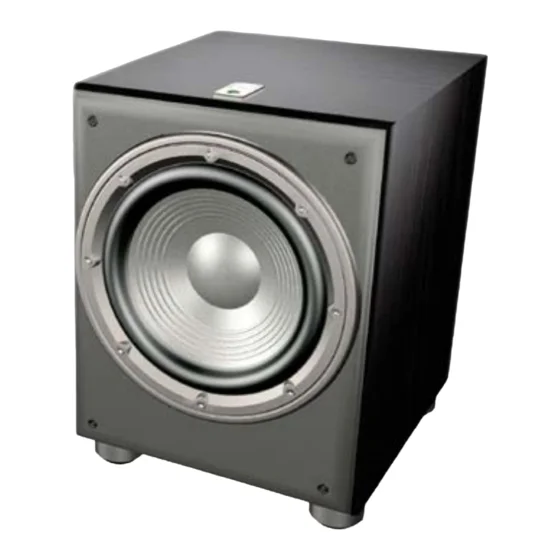
The JBL E250P and JBL E230 subwoofers are fantastic options for anyone looking to upgrade their sound system with deeper bass and fuller sound. But how do you actually get these speakers set up and connected to your home theater or audio setup? In this article, we’ll walk you through connecting JBL E250P/230 subwoofers, highlighting key steps, tips, and tricks to ensure that you get the best possible sound from your new system.
Why Choose the JBL E250P/230?
Before diving into the connection process, let’s quickly cover why the JBL E250P/230 is such a great choice for anyone looking to add bass to their audio setup.
- Powerful Bass: Both the JBL E250P and JBL E230 are designed to provide rich, deep bass that fills your room.
- Affordable and Reliable: These models offer solid performance without breaking the bank, making them an excellent choice for most audio setups.
- Compact Design: While packing a punch in terms of sound, they don’t take up too much space.
Now that we’ve established why you should go for these subwoofers, let’s get into connecting JBL E250P/230 to your system.

Step-by-Step Guide to Connecting JBL E250P/230 Subwoofer
Step 1: Understand Your Audio Setup
Before connecting the JBL E250P/230, it’s crucial to know what audio system you’re connecting it to. These subwoofers can work with:
- AV receivers (home theater systems)
- Amplifiers
- Stereo systems
Check the audio output of your receiver or amplifier to ensure it’s compatible with the subwoofer. Typically, you’ll use either RCA line-level or speaker-level inputs depending on the equipment you’re connecting.
Step 2: Identify the Input Type
The JBL E250P and E230 models feature two common input types:
- RCA Line-Level Input: This is the preferred method for connecting your subwoofer to most modern home theater systems and AV receivers. You’ll use a single RCA cable (or a stereo RCA cable, depending on your system) to connect the subwoofer to the subwoofer output of your receiver.
- Speaker-Level Input: If your receiver doesn’t have a dedicated subwoofer output, you can use the speaker-level connection. This involves connecting the left and right speaker terminals from your amplifier to the speaker-level inputs on the subwoofer. This method sends a signal through the regular speaker wires and allows the subwoofer to receive the audio it needs.
Step 3: Powering the Subwoofer
- Plug the power cable into the subwoofer and connect it to a wall outlet.
- Ensure that the power switch on the back of the subwoofer is in the “off” position before proceeding with any connections.
Step 4: Connecting to the Receiver or Amplifier
- If you are using RCA line-level connections, simply connect the RCA cable from the subwoofer output of your AV receiver or amplifier to the RCA input on the JBL subwoofer. This input is typically labeled LFE (Low-Frequency Effects) or SUB IN.
- If you are using speaker-level inputs, connect the positive (red) and negative (black) terminals of your amplifier’s left and right speaker outputs to the corresponding terminals on the subwoofer. Then, you’ll use the same terminals to connect the subwoofer back to the speakers, creating a loop.
Step 5: Adjust the Settings
Once the JBL E250P/230 is connected, you’ll need to adjust a few settings to optimize the sound:
- Crossover Frequency: The subwoofer has a built-in crossover control that allows you to set the frequency range at which it handles bass. Set this to a value that works with your speakers (usually around 80Hz-120Hz).
- Phase Adjustment: Some subwoofers, including the JBL E250P and E230, allow you to adjust the phase of the subwoofer (0 or 180 degrees). If the subwoofer sounds out of sync with your speakers, try switching the phase.
- Volume Control: Adjust the volume knob on the back of the subwoofer to match the rest of your audio system. This will help ensure that the bass doesn’t overpower the rest of the sound or get drowned out.
Step 6: Test the Sound
- Play a Soundtrack: Once everything is connected and the settings are adjusted, play some music or a movie with deep bass. This will help you test the integration of the JBL E250P/230 with your system.
- Fine-Tuning: If the bass is too loud or too soft, go back and adjust the subwoofer’s volume, crossover, and phase until it sounds just right.

Troubleshooting Common Issues
When connecting the JBL E250P/230, you may encounter some common issues. Here’s how to troubleshoot:
- No Sound: Double-check all connections. Ensure the power switch is on, and the cable connections are secure. Make sure the subwoofer output on the receiver is active.
- Humming or Buzzing Noise: If you hear unwanted noise, this could be due to a grounding issue. Try using a ground loop isolator or adjust the connection setup.
- Bass is Too Low: If the bass isn’t strong enough, increase the subwoofer volume or adjust the crossover frequency to allow more bass through.

Conclusion
The process of connecting JBL E250P/230 is straightforward and can add a whole new dimension to your audio setup. By following the proper connection steps and tweaking the settings to suit your room and preferences, you’ll enjoy deep, rich bass for movies, music, and games.
If you’re looking for a reliable, powerful subwoofer that can deliver quality bass without taking up too much space, the JBL E250P and E230 are excellent choices. Whether you’re connecting through RCA or speaker-level inputs, these models are built to integrate seamlessly into a variety of audio systems.
So, the question remains: Are you ready to enhance your audio experience with the JBL E250P/230 subwoofer?


